Download the Info deck on how to create a CTV/OLV creative using Social Import (auto-fill) Here
This article will explain the procedure to follow when creating a CTV/OLV (VAST) creative in the Nova platform via social import (auto-fill)
Social Import (auto-fill) works only with Facebook, Instagram, Youtube, TikTok, X (formerly Twitter) and LinkedIn Public posts. For other social media like Snapchat, Pinterest etc. needs to be created manually
You can read more about CTV Tech Specs, FAQs and Benefits Here
Procedure
- Once you login into Nova UI, you'll need to create a new campaign. Learn about creating a new campaign here
- Under a campaign, hover over to the Add Creative button.
-png.png)
- Select either of the option to Add CTV (VAST) Creative or Add OLV (VAST) Creative button.
-png.png)
- Select the Import from Social Post button
-png.png)
- Paste the Public Social Post URL in the box.
Learn more about how to copy Public Social Post URL from social media post here-png.png)
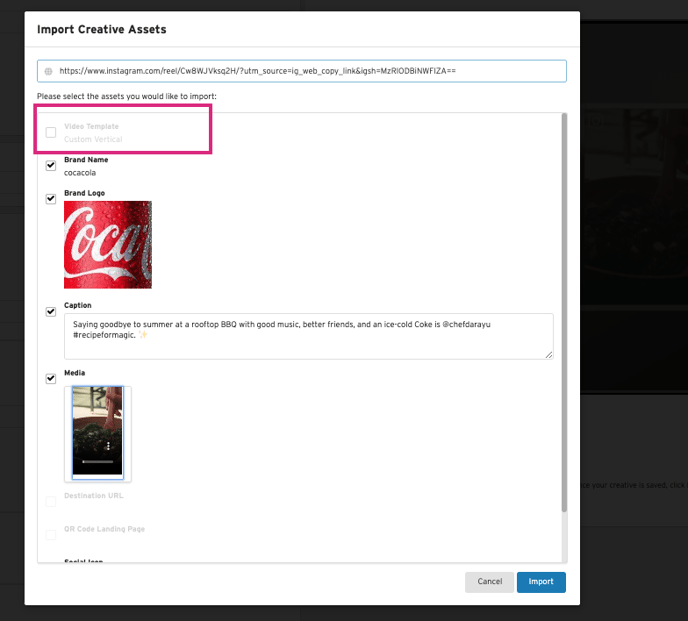
- Once we extract the assets from the social media post, select the assets to import and click on Import.
-png.png)
- Additionally if you desire to change the video template that gets selected by default once you import a url
- Deselect the default template that is automatically chosen when the social post is imported
- And then select the preferred template once the post is imported automatically.
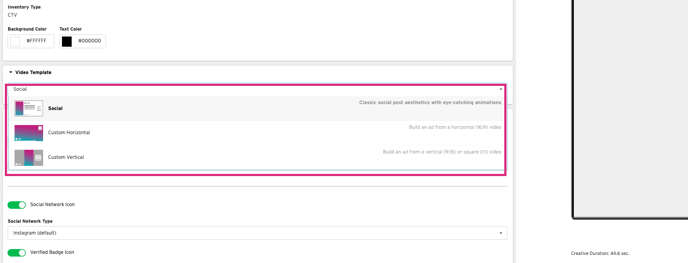
- Deselect the default template that is automatically chosen when the social post is imported
- Additionally if you desire to change the video template that gets selected by default once you import a url
- Add the Creative Name in Creative Details. Optional: Select Background Colour and Text Colour if desired.
-png.png)
-
Customized QR Codes for CTV
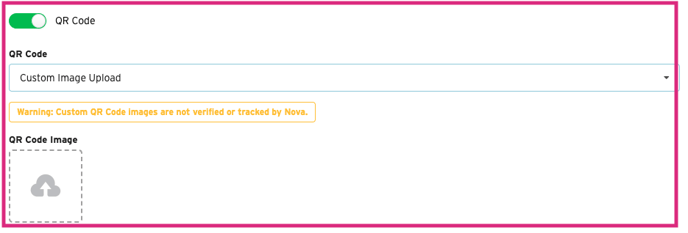
- To customize QR codes under any CTV creative, navigate to the QR Code section of the creative.
- The default is “standard”, click the dropdown box and select Custom Image Upload
- Drag and drop the custom QR code onto the QR Code Image upload (or just click it and select the image to upload)
- There are no specific minimum height/width requirements; standard QR codes should suffice.
- Support (PNG/JPG) image formats.
- Tracking is not enabled on customized QR code uploads.
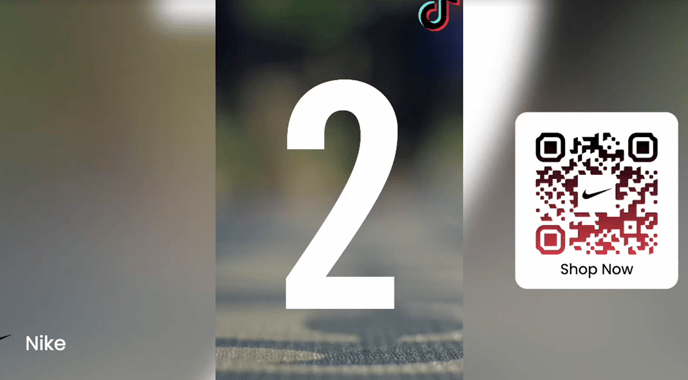
- View the Preview section to see how the video will look, in real-time.
-png.png)
For Best Practices, keep the caption/CTA short so the viewer is able to read them. Also, remove any hashtags from the caption as they don't really fit in the CTV environment.
- Hit the Save button to save the creative.
-png.png)
- Click on Render button to generate the VAST tag. This may take up to 30 minutes.
-png.png)
- If rendering is not yet complete, you will see a warning message. Wait a few more minutes and try again.
-png.png)
- Select Review Render to Approve or Reject the creative.
-png.png)
- Clicking Approve will lock the creative and it can no longer be edited. It will then allow you to export your VAST Tag.
-png.png)
Once you Approve the rendered creative, you will no longer be allowed to change it. If you need to make changes to an approved creative, Duplicate the creative, make your changes, then Render the duplicated creative.
14. If you’re not satisfied, Reject the creative and resubmit another render once you’ve made changes. Rejecting the render returns the creative to the editing stage .
-png.png)
Learn about Trafficking the VAST Tags in your Ad Server/DSP here
If you've any further questions or facing any difficulty in creating a CTV/OLV creative via Social Import, send us your request to support@createwithnova.com