Promote Branded Content via Newsletters
Download One Pager Info about how to Promote Branded Content via Newsletters here
This knowledge base entry walks you through the setup and workflow of branded content promotion within your daily, weekly, and/or monthly newsletters.
This article is split across 3 steps:
- Setup of Newsletters
- Curate Newsletters
- Report on Newsletters
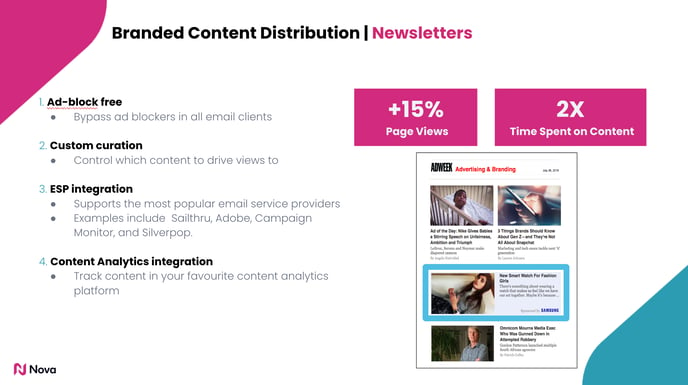
Step 1: Setup
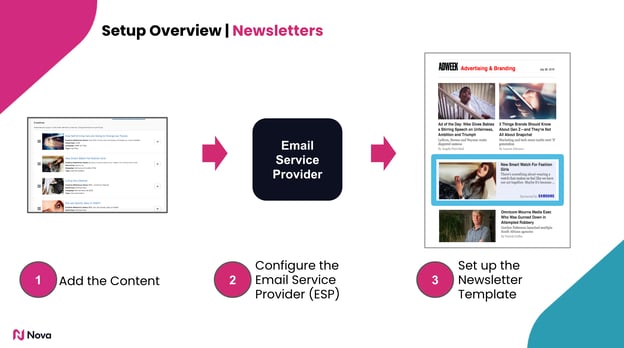
There is a one-time setup and configuration step to integrate your content directly into your ESP.
- Create a “Promo Feed” in Nova's UI and add content in it
- Set up a ‘Merged-feed’ in your ESP that includes your editorial and branded content
- Set up a newsletter template that pulls content from the merged feed
1. Creating and Configuring a Promo Feed:
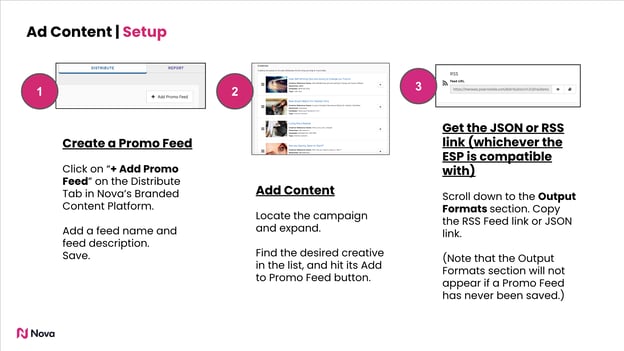
Creating and configuring a promo feed is easy.
You’ll have control over:
- Name of promo feed
- Label of promo feed (for reporting purposes)
- Analytics integration (query string parameters for all links)
- Content inclusion and ordering
To create a Promo Feed:
- On the Distribute tab, click the Add Promo Feed button. (If you do not see the Distribute tab, speak to your Account Manager or Sales Consultant to enable it).

- Provide the Promo Feed Name, and optional Promo Feed Description.
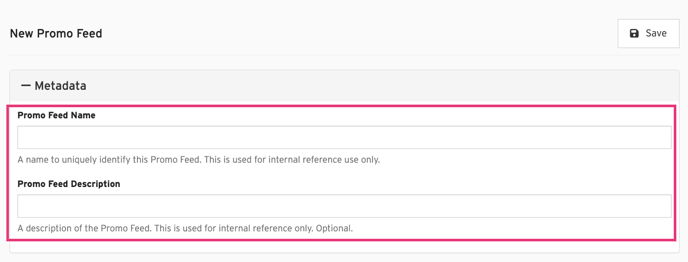
- Save the promo feed.
To get the JSON link
- Scroll down to the Output Formats section. (Note that the Output Formats section will not appear if a Promo Feed has never been saved.)

- In the JSON sub-section, click the eye icon. This will open the JSON feed in a new browser tab. Alternatively, you can directly copy the URL from the Feed URL text box.
- Import the JSON feed URL into the desired third-party system.

Please be aware that Promo Feeds can only accommodate creatives of the following types: Hosted Content, Internal Content, and External Content.
2. Connecting Nova to your ESP
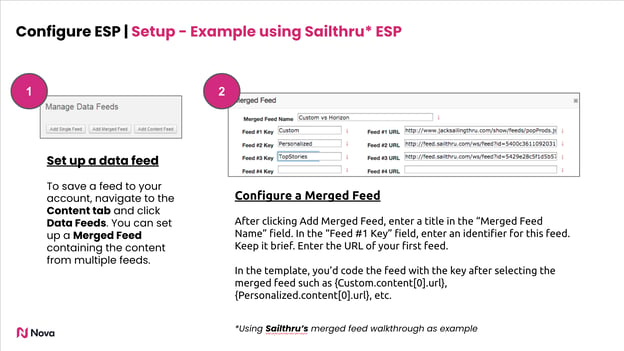
Email service providers drive newsletters via data feeds. The easiest way to connect Nova’s platform to your ESP is to leverage the ESP’s “merged-feed” capability.
- Create a new merged feed
- Add your original content feed URL
- Add Nova’s promo feed URL
- Save
To find the promo feed JSON URL that you set up in the first step, click on the promo feed title within the “Distribute” tab and scroll to copy the JSON link. That is the link you’ll want to paste into your ESP’s merged feed mechanism.
That’s it. Now your Newsletter template will have access to both your editorial content, as well as your branded content.
3. Configure your Newsletter Template
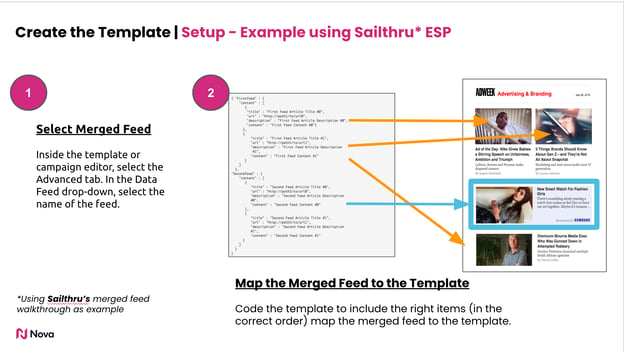
A template provides the look and feel of your Newsletter. You’ll want to create a newsletter that can be built on top of the merged feed set up earlier.
Work with your design, newsletter, and branded content team to put together a design for branded content that includes the appropriate disclosure for your branded content.
Things to consider re: your newsletter template
- Location
- Disclosure
- Style
- Images
Step 2: Curation
With Nova’s promo feed execution, you have full control over inclusion and ordering.
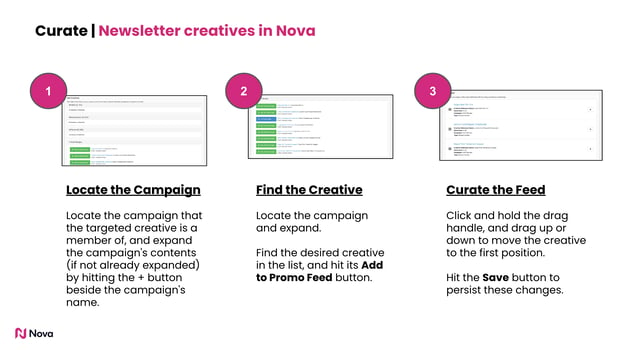
1. Locate the campaign
- Scroll down to the Add Creatives section.
- Locate the campaign that the targeted creative is a member of, and expand the campaign's contents (if not already expanded) by hitting the + button beside the campaign's name.

2. Find and add creatives
- Find the desired creative in the list, and hit its Add to Promo Feed button

- For each additional creative, repeat steps 1 through 2.
- Hit the Save button to persist these changes.
Note that creatives are automatically added to the bottom of the list (i.e., at the lowest priority).
3. Curate the promo feed
- Scroll up to the Creatives section.

- Click and hold the drag handle (the icon with three vertical lines) to the left of a creative, and drag up or down to move the creative.
- Drop the creative in the desired position in the list.
- Repeat steps 2 through 3 until the creatives are in the desired order of priority.
- Hit the Save button to persist these changes.
To remove creatives from a Promo Feed:
- Scroll to the Creatives section.
- Locate the creative that is intended to be removed, and hit its x button.
- For each additional creative to remove, repeat step 2.
- Hit the Save button to persist these changes.
Step 3: Report
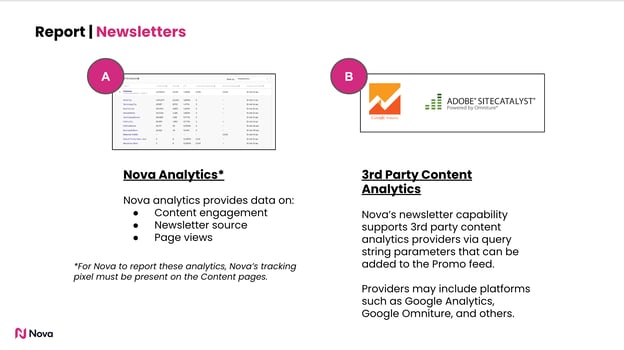
Nova has built in the ability to both track analytics within Nova as well as within your favourite content analytics platform (e.g. Google Analytics) for example.
- Tracking in Nova
- Tracking in your content analytics (3rd party)
1. Tracking in Nova
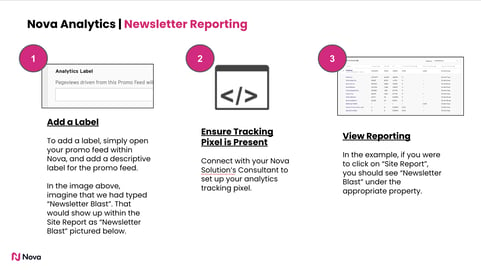
To set up tracking in Nova, follow these simple steps:
- Add a “Label” to the promo feed
- Ensure Nova's tracking script is enabled on your content pages
To add a label, simply open your promo feed within Nova, and add a descriptive label for the promo feed. All clicks generated from this promo feed will be tracked against this property label in Nova’s reporting interface. In the image below, imagine that we had typed “Newsletter Blast”. That would show up within the Site Report as “Newsletter Blast” pictured below.

To check if Nova’s tracking script is enabled on your content pages, please validate with Nova’s support team.
2. Tracking in your content analytics (3rd party)
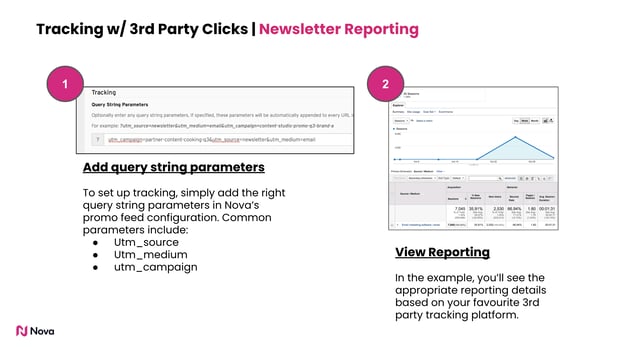
To set up tracking, simply add the right query string parameters in Nova’s promo feed configuration. Common parameters include:
- utm_source
- utm_medium
- utm_campaign
Each of these should be included as a string to the promo feed. Each piece of content in the promo feed will have these query string parameters included.
As an example, you could include: utm_source=newsletter&utm_medium=email
Your Google Analytics or other content analytics platform will pick up on these parameters and surface your tracking appropriately.
If you have any additional questions or need further assistance, please don't hesitate to reach out to our support team at support@createwithnova.com. We're here to help!